Converting a Safelist (Whitelist) File to the New (v5.0+) Format

If you have a safelist (whitelist) file that was created under AC-Hunter 4.0.0 or earlier (by selecting “Download Whitelist” from the Settings box) and wish to convert it to the new format needed for version 5.0.1 or above, please do the following:

# Please note that you must put your safelist (whitelist) file in /opt/zeek/remotelogs/

cp -p path_to_your_old_whitelist_file.json /opt/zeek/remotelogs/old-whitelist.json

cd /opt/zeek/remotelogs/

hunt run --rm -u 0 api /home/api/middleware upgrade-whitelist /opt/zeek/remotelogs/old-whitelist.json /opt/zeek/remotelogs/new-whitelist.json


You can now copy /opt/zeek/remotelogs/new-whitelist.json to where you keep your whitelist backups. You can also import this new safelist (whitelist) into AC-Hunter version 5.0.1 and above. (Note, if you’re running 5.0.0, please upgrade to 5.0.1).


Direct Link to this FAQ Item: https://portal.activecountermeasures.com/support/faq/?Display_FAQ=3229

Read More

How Do I Change One of the Configuration Files for Docker-Zeek?

The zeekctl.cfg and networks.cfg files are usually stored inside the docker-zeek image and any running container. To edit them, we’ll copy them out to the docker host, make changes there, then restart docker-zeek so it will use those changed configuration files from now on.

No matter which file you wish to edit:

1. Download the new zeek script:

sudo mkdir -p /opt/zeek/bin
sudo wget -O /opt/zeek/bin/zeek https://raw.githubusercontent.com/activecm/docker-zeek/master/zeek
sudo chmod 755 /opt/zeek/bin/zeek
cd /usr/local/bin/
sudo ln -sf /opt/zeek/bin/zeek zeek


If you wish to edit zeekctl.cfg (for example, to turn on automatic log pruning (User Guide, section “Deleting Zeek Logs”) ):

2a. Copy out the zeekctl.cfg file to the host and edit it:

sudo mkdir -p /opt/zeek/etc/
sudo docker cp zeek:/usr/local/zeek/etc/zeekctl.cfg /opt/zeek/etc/zeekctl.cfg
sudo nano /opt/zeek/etc/zeekctl.cfg


If you wish to edit networks.cfg to change the local network settings:

2b. Copy out the networks.cfg file to the host and edit it:

sudo mkdir -p /opt/zeek/etc/
sudo docker cp zeek:/usr/local/zeek/etc/networks.cfg /opt/zeek/etc/networks.cfg
sudo nano /opt/zeek/etc/networks.cfg


If you wish to edit local.zeek (for example, to enable or disable zeek processing modules or change the tcp_inactivity_timeout or Pcap::snaplen):

2c. Copy out the local.zeek file to the host and edit it:

sudo mkdir -p /opt/zeek/share/zeek/site/
sudo docker cp zeek:/usr/local/zeek/share/zeek/site/local.zeek /opt/zeek/share/zeek/site/local.zeek
sudo nano /opt/zeek/share/zeek/site/local.zeek


No matter which file you edited:

3. Download newest image (if any) and restart zeek:

zeek update


Direct Link to this FAQ Item: https://portal.activecountermeasures.com/support/faq/?Display_FAQ=3132

Read More

How Do I Switch a System That’s Running RITA Every 2 Hours to Running It Every Hour?

The earliest releases of AC-Hunter ran RITA every 2 hours. If you’ve had AC-Hunter for a long time and have upgraded it in place, that setting may still be there.

Current releases of AC-Hunter run RITA every hour so you can see your data with less delay. To make this change:

  • Log in to the AC-Hunter host.
  • Edit /etc/AC-Hunter/config.yaml with your preferred editor:
sudo vim /etc/AC-Hunter/config.yaml
  • Locate the Schedule line under the RITA: section (note; there are multiple “Schedule:” lines in this file). If it’s currently set to run every two hours, it will look like:
Schedule: "0 20 0-23/2 * * *"

(If it doesn’t have the “/2” following 0-23, RITA is already run every hour and you can stop here.)

  • Remove the “/2” from that line so it now looks like:
Schedule: "0 20 0-23 * * *"

Be careful not to change the number of spaces at the beginning of that line. Save your changes and exit.

  • Now load these changes into AC-Hunter with the following commands.
sudo ./hunt down
sudo ./hunt up -d --force-recreate
  • As a side note, when AC-Hunter is restarted, RITA is automatically run.


Direct Link to this FAQ Item: https://portal.activecountermeasures.com/support/faq/?Display_FAQ=2769

Read More

Clicking on the BeaKer Icon Does Nothing

(NOTE: This only applies to AI-Hunter version 3.8.0; 3.8.0 was the first version with BeaKer included.  Versions 4.0.0 and higher have this bug fixed.  To find out your AI-Hunter version, go to the Dashboard, Settings (gear in the upper right), and “About”.)

On your AI-Hunter system, look at /etc/AI-Hunter/config.yaml . Near the bottom of that file you should have a line starting with “BeakerHost:”, like one of the following forms:

BeakerHost: “https://14.96.107.22:5601”
or
BeakerHost: “https://beakerhostname.example.com:5601”
or
BeakerHost: “https://[2604:a340:206:d94::13:8001]:5601”
or
BeakerHost: “https://2604:a340:206:d94::13:8001:5601”

Each of these forms has the IP address or hostname of the BeaKer server, as well as the port on which that server is run (5601 by default).

The first three forms are fine – they tell AI-Hunter how to reach the BeaKer server when it’s on an IPv4 address, hostname, or IPv6 address, respectively. If you have one of these first three, this faq entry doesn’t apply to you; contact [email protected] for help.

The fourth form is almost identical to the third, but is missing the square brackets around the IPv6 address. These are required, so if your “BeakerHost” line is missing them as well, do the following:

  • While still logged in to your AI-Hunter server, edit the file /etc/AI-Hunter/config.yaml (substitute your favorite editor for vim):
sudo vim /etc/AI-Hunter/config.yaml
  • Scroll down to the BeakerHost line.
  • Edit that line and add a left square bracket immediately after “://”
  • Add a right square bracket immediately before “:5601”
  • While the IPv6 address inside the brackets will be different, your line should look like:
BeakerHost: "https://[2604:a340:206:d94::13:8001]:5601"
  • Save the file and exit
  • Run the following commands:
cd ~/AIH-source/AI-Hunter-latest/
sudo ./hunt down
sudo ./hunt up -d --force-recreate

Go back to your AI-Hunter console, force a reload of the page with shift-ctrl-R, and try clicking on the BeaKer icon again – a new tab should be opened with the BeaKer console.


Direct Link to this FAQ Item: https://portal.activecountermeasures.com/support/faq/?Display_FAQ=2757

Read More

What Configuration Options Should I Include in a Cisco ISR Configuration?

The following are the lines relevant to enabling Netflow in a Cisco ISR:

What to Collect

flow record MyNetflow
match ipv4 tos
match ipv4 protocol
match ipv4 source address
match ipv4 destination address
match transport source-port
match transport destination-port
collect transport tcp flags
collect counter bytes long
collect counter packets long
collect timestamp absolute last
collect flow end-reason
collect timestamp absolute first
!

Where to Send the Data

flow exporter MyNetflow
destination destination.ip.goes.here
source GigabitEthernet0/0/0
transport udp 2055
template data timeout 60
!

Tie Them Together

flow monitor MyNetflow
exporter MyNetflow
cache timeout active 60
record MyNetflow
!

The “ip flow monitor” lines associate this interface with sending Netflow records:

interface GigabitEthernet0/0/1
ip flow monitor MyNetflow input
ip flow monitor MyNetflow output
ip address xxx.xxx.xxx.xxx xxx.xxx.xxx.xxx
ip nat inside
!

For more information about configuring Cisco routers, see:
https://www.cisco.com/c/en/us/td/docs/ios-xml/ios/fnetflow/configuration/xe-16/fnf-xe-16-book/fnf-ipv4-uni.html


Direct Link to this FAQ Item: https://portal.activecountermeasures.com/support/faq/?Display_FAQ=2726

Read More

Can I Feed Netflow Records From More Than One Router/Device to an Active-Flow Instance?

Yes, as many as you want! All records will show up in a single AC-Hunter database. If you need to separate them into individual databases, you’ll need two Active-flow docker instances (which must be on separate physical systems.)


Direct Link to this FAQ Item: https://portal.activecountermeasures.com/support/faq/?Display_FAQ=2725

Read More

Can I Run Active-Flow and Import Standard Zeek Logs on a Single AC-Hunter System?

Yes. You can have one or more Active-Flow systems and one or more Zeek systems feeding a single AC-Hunter instance. Each one feeds a different database whose name is: “hostname__ipaddress-rolling” so you can distinguish between them.

Note: you can’t have Zeek and the Active-Flow module running on the same system, they both use /opt/zeek/logs/ for their output.


Direct Link to this FAQ Item: https://portal.activecountermeasures.com/support/faq/?Display_FAQ=2724

Read More

Troubleshooting Active-Flow

Is the Active-Flow docker instance running?

On the Active-Flow system run:

sudo docker ps

The output should include one line that ends in “active-flow”, indicating that the instance is currently up and forwarding udp port 2055. Example:

CONTAINER ID IMAGE COMMAND CREATED STATUS PORTS NAMES
237ae0c61325 ac-hunter/flow "/home/flow/active-f…" 6 weeks ago Up 6 weeks 0.0.0.0:2055->2055/udp active-flow


Are inbound UDP port 2055 packets allowed by the firewall?

On the Active-Flow system get a firewall listing with:

sudo iptables -L INPUT -nxv

If the INPUT chain has no rules and a policy of ACCEPT (like the following):

Chain INPUT (policy ACCEPT 3130808 packets, 1218284392 bytes)
pkts bytes target prot opt in out source destination
$

that means all incoming traffic is allowed. If you do have rules in this chain and need help interpreting if that port is open or not, please send the above output to [email protected]


Are Netflow packets arriving on UDP port 2055 on the Active-Flow system?

The tcpdump program can show a single line output for each received packet. Here’s a sample command to report on received netflow packets, assuming that the primary network interface to the Internet is eth0:

sudo tcpdump -i eth0 -qtnp -c 10 'udp port 2055'

If Netflow records are arriving on that port, you’ll see output similar to:

tcpdump: verbose output suppressed, use -v or -vv for full protocol decode
listening on eth0, link-type EN10MB (Ethernet), capture size 262144 bytes
IP a.b.c.d.57001 > e.f.g.h.2055: UDP, length 264
IP a.b.c.d.57001 > e.f.g.h.2055: UDP, length 120
IP a.b.c.d.57001 > e.f.g.h.2055: UDP, length 312
IP a.b.c.d.57001 > e.f.g.h.2055: UDP, length 120
IP a.b.c.d.57001 > e.f.g.h.2055: UDP, length 312
IP a.b.c.d.57001 > e.f.g.h.2055: UDP, length 76
IP a.b.c.d.57001 > e.f.g.h.2055: UDP, length 1080
IP a.b.c.d.57001 > e.f.g.h.2055: UDP, length 1032
IP a.b.c.d.57001 > e.f.g.h.2055: UDP, length 456
10 packets captured
10 packets received by filter
0 packets dropped by kernel

This shows that the router at a.b.c.d is sending netflow records to the Active-Flow system at e.f.g.h .

If the tcpdump command prints “listening on eth0……” and stops, producing no more output, you may want to check your router configuration to make sure it’s feeding Netflow records to the right address and port. Please see the end of this document for a suggested configuration for Cisco ISR routers.


Are records making it out to log files?

Active-Flow saves its output to the “/opt/zeek/logs/’ directory tree. In particular, the currently generated logs are in “/opt/zeek/logs/flow-spool”.

To confirm that Active-Flow is saving records to disk, run the following on the Active-Flow system:

cd /opt/zeek/logs/flow-spool/
ls -al
tail -f conn.log

Within 60 seconds you should see new lines being added to this file. (Note: in the first 10 minutes after rebooting Active-Flow’s system or restarting Active-Flow, you may not see entries being added until the router sends the first template. Either wait for 15 minutes to pass, or run “sudo docker logs -f active-flow –tail=20” and look for lines like:

time="2020-03-03T21:47:37Z" level=error msg="Could not decode incoming data" error="No info template 2615 found for and domain id 256" fatal=false

to confirm that this is why you’re not yet getting logs. This issue should definitely disappear by the time the system has been up for 15 minutes.)


Are the compressed logs getting sent to /opt/zeek/logs/yyyy-mm-dd each hour?

At the end of each hour the active logs are compressed and moved to a directory for today’s date. To see them, run:

ls -al /opt/zeek/logs/`date +%Y-%m-%d`/

With the exception of the hour right after midnight you should see multiple files with the extension “.log.gz”. If you don’t, check with [email protected]


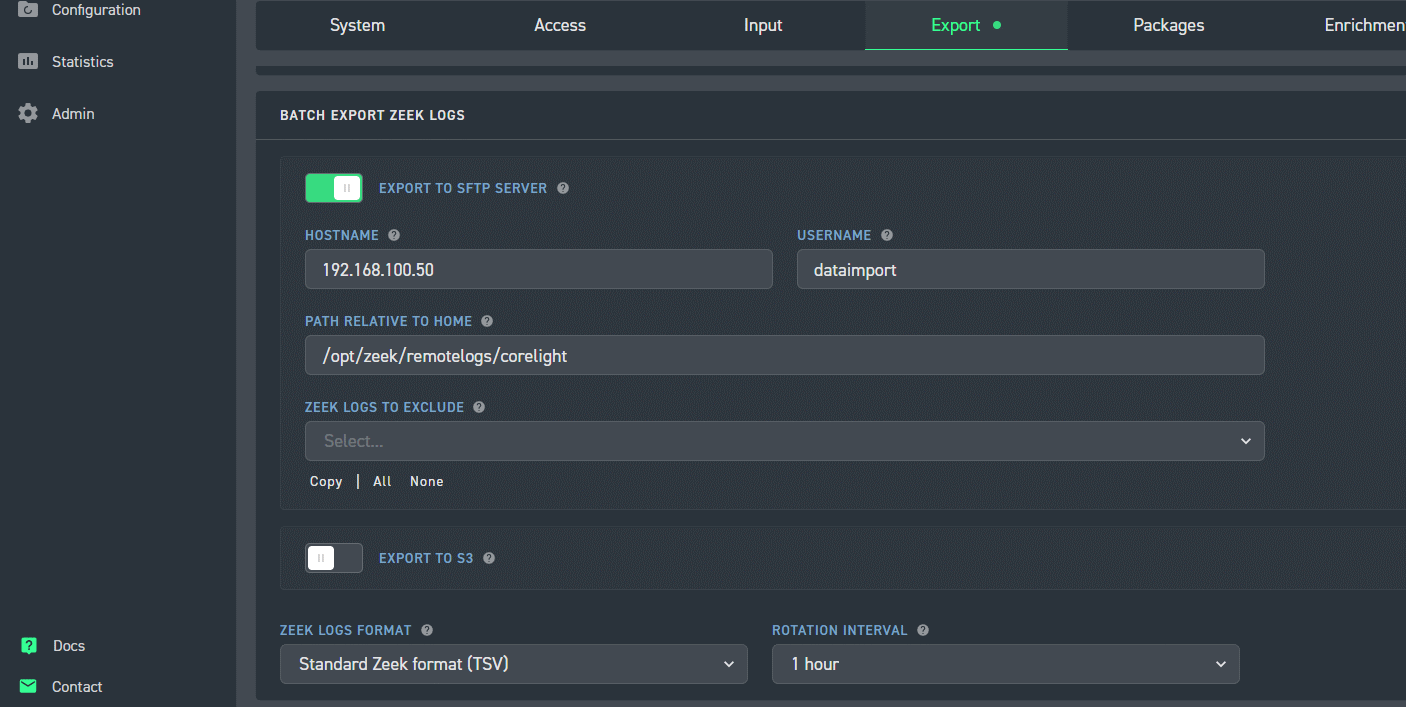
Are ssh connections allowed from Active-Flow to AC-Hunter?

Can you ssh from Active-Flow to dataimport@AC-Hunter without supplying a password?

Can you run zeek_log_transport.sh and push logs to AI-Hunter?

Is the cron job set up to automatically transfer logs?

Are the logs showing up on the AC-Hunter system in /opt/zeek/remotelogs/sensor-name/yyyy-mm-dd ?

The above 5 questions are covered in the FAQ at https://portal.activecountermeasures.com/support/faq/?Display_FAQ=861


Direct Link to this FAQ Item: https://portal.activecountermeasures.com/support/faq/?Display_FAQ=2722

Read More

I Have a Corelight Sensor. What Do I Do to Make It Work with AC-Hunter?

I have a Corelight sensor. What do I do with it to make it work with AC-Hunter?

1. Set the time zone on the sensor to UTC/GMT or Britain [UK]/London depending upon your available options:

2. Configure the Corelight sensor to export its Zeek logs to your AC-Hunter box over SFTP.

a. When asked for a hostname to send the logs to, put in the IP address or hostname of your AC-Hunter box. (The sensor should be able to place outgoing ssh (tcp port 22) connections to this hostname/IP).

b. The Username to use is “dataimport”.

c. Ask the Corelight sensor to send the logs to /opt/zeek/remotelogs/sensorname/ , where sensorname is the name of this Corelight sensor, made up of the following characters and 52 characters or less: a-z A-Z 0-9 _ ^ + =

d. The Zeek log format to use is “Standard Zeek format (TSV)”.

e. The Rotation interval should be 1 hour.

f. The sensor will generate an SSH key to use; append the key to the file /home/dataimport/.ssh/authorized_keys on your AC-Hunter box.

g. Once your Corelight sensor has sent over one set of logs, find the directory that holds the logs on the AC-Hunter box. In the above example where we ask for the files to be placed under /opt/zeek/remotelogs/sernsorname/ , Corelight will actually place them under /home/dataimport/opt/zeek/remotelogs/sensorname/logs/ . To make them show up in the right directory, edit /etc/fstab with the following (substitute your favorite editor):

sudo vi /etc/fstab

Add the following line, replacing both instances of the sensorname and making sure the first directory matches where Corelight sends the logs:

/home/dataimport/opt/zeek/remotelogs/sensorname/logs/ /opt/zeek/remotelogs/sensorname/ none defaults,bind 0 0

Save the file and exit.

h. Please run the following commands, substituting your actual Sensor name for sensorname :

sudo mkdir -p /home/dataimport/opt/zeek/remotelogs/sensorname/logs/
sudo chown -R dataimport.dataimport /home/dataimport/opt/zeek/remotelogs/sensorname/logs/

i. Reboot – the reboot step is required here.

j. If you’re not able to do the above for some reason, contact [email protected] and ask them to connect the upload directory to the directory where the logs are being placed.


Read More

Creating and Using a Local Blacklist

To use this feature, you must be using version 3.4.0 or higher (we strongly recommend 3.4.1 or higher).

Overview: To create your own blacklist, you’ll create a file (“/etc/AC-Hunter/blacklist/ips.txt”) on the Rita/AC-Hunter system with the ipv4 and ipv6 addresses listed one per line, instruct Rita to use this file by editing “rita.yaml”, and load these new addresses into Mongo. Once this is done, these addresses will be tagged as blacklisted on new data imported from Zeek (though old Zeek logs will not be modified).

Detailed steps:

1. Add the following block to “/etc/AC-Hunter/rita.yaml” , verbatim. We don’t recommend changing the filename in this release.  Note that the second and third lines need to be indented with spaces.

BlackListed:
  # Lists containing both IPv4 and IPv6 addresses are acceptable
  CustomIPBlacklists: ["/etc/AC-Hunter/blacklist/ips.txt"]

2. Create “/etc/AC-Hunter/blacklist/ips.txt” and add your IPs, one per line.

3. After creating this file – and every time you make a change to it – run the following commands:

If you’re running AC-Hunter 4.0.0 or higher:

rita test-config
hunt run --rm db_client mongo_cmd.sh 'db.getSiblingDB("rita-bl").dropDatabase()'
hunt up -d --force-recreate


If you’re running AI-Hunter 3.8.0 or lower:

cd ~/AIH-source/AI-Hunter-latest/
rita test-config
./hunt run --rm db_client mongo_cmd.sh 'db.getSiblingDB("rita-bl").dropDatabase()'
./hunt up -d --force-recreate

The “rita test-config” will tell you if there are any errors in the rita configuration file.

The ip addresses you’ve placed in ips.txt will be tagged as blacklisted in log files imported from this point on. Logs that were imported previously will not show these IP addresses as blacklisted.

Read More